Categories Energy Savings, Home Inspection

Problems With Skylights and How to Avoid Them

Skylights

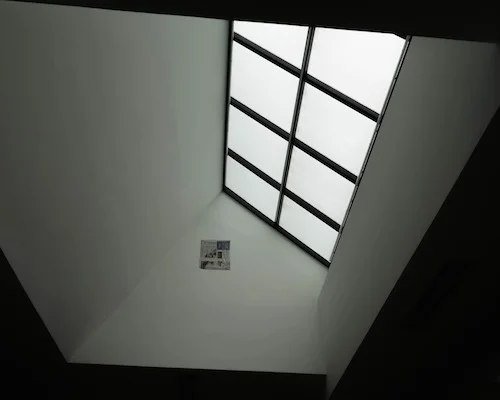
Skylights can be great because they can connect your home to the nature around it. Giving you a flood of natural light and awesome views of starry nights, what’s not to love?

However, like most things in the home skylights can run into some issues.

Many building experts view skylights as the weak link in the chain of the home because they are exposed to extreme temperature and pressure.

What Could Go Wrong?

Some of the most common and known problems with skylights are water leakage, but other issues arise such as:

  • excess daylight, glare and UV (ultra-violet radiation) damage 
  • energy loss
  • overheating
  • roof ventilation problems
  • ice dams

What Causes These Problems?

Normal wear, poor installation, and location of the skylight are all catalysts for problems.

  1. Many skylights use gaskets and deck seals or flashing, and over time they are susceptible to the typical wear and tear. Regular re-flashing and re-sealing can prevent water leakage.


  1. A skylight that has been properly installed will rarely fail in the first few years, but one that hasn’t been done well will show problems fairly quickly. Keep an eye on skylights with low levels of insulation or sealing on the underside of the skylight.


  1. Skylights placed in bathrooms are not a good idea. This is a room with high-humidity, and the large amounts of condensation can lead to cracks and serious moisture problems.

In addition to these issues repairing the skylight can be an issue in itself.

Due to awkward locations and placements being able to reach the skylight to repair can be a rather burdensome task. While inconvenient, it’s not impossible.

What Can I Do?

Although most of the problems we’ve discussed today are out of your control, some issues stem from poor homeowner care. Thanks to inconvenient placement many people put off cleaning their skylight.

However, you should strongly considering hiring a professional service like a window cleaner to get the skylight for you. Regular upkeep will extend the life of your skylight.

If you’re unable to contract a pro, don’t worry, there’s plenty you can do to take care of your skylight! Before getting started, you should find out what material your skylight is made out of; they aren’t made out of glass like typical windows, but rather acrylic or polycarbonate.

Cleaning them with household window cleaners or ammonia could destroy them.

What Can I Use?

  • Liquid dish soap
  • Long-handle dry mop
  • Auto wax
  • Cleaning cloths or clean rags
  • Power washer (outside of skylights only)
  • Cellulose sponge or long-handled cellulose sponge mop

Make sure you have a safe and sturdy path to the skylight then remove all the dust and debris, wash the windows, and finish by applying a thin layer of auto wax to the clean, dry window.

We Want to Hear From You!

Have you come across any of these issues with your skylight? Have you attempted to clean it yourself? Let us know about your own experience!

If you have any doubts about any issues in your home today, don’t hesitate to get in touch with us.

Image attribution

Categories Home Inspection

Things Your Inspector Wants You to Know

home inspection, home, inspection, buyer, seller, inspector, basement

After years of working in the industry and hundreds of experiences with inspections, buyers, sellers, etc. we at EIG have realized there is a gap when it comes to communication between homeowner and home inspector. 


That’s why we’ve dedicated our company mission to bridging the gap and improving the home inspection experience. 


Home inspections are a big deal, for sellers this could be the confrontation of the maintenance issues you neglected over the years.  


For buyers, an inspection can lead to heartbreak if a report finds the home is not worth buying. 


While that sounds scary, our intention is not to frighten you, but to keep you informed.  


With that being said there are a few golden rules that every home inspector wants homeowners to know before starting the process. 

For Sellers 

 1. Mind Your Pets

Be sure to leave them in a crate or at a friend’s house during the inspection. Not only is it distracting, it could be dangerous.  


During the average inspections doors, gates, windows, etc. will constantly open and close, giving your pet an easy opportunity to escape. 


 2. Get Rid of the Clutter 

While it’s not totally necessary to have a spotless home for the inspection (an inspector won’t care if your stove is dirty) you do want to make sure there are no barriers that prevent entrance into different rooms.  


Allowing the inspector to have easy and quick access to all rooms, including basement and attic, the experience will be smoother for everyone. 


3. Schedule a Playdate 

If you have babies or small children, it’s a good idea to get them out of the house during the inspection too.  


If you can get a family member or friend to watch them at a different location that would be ideal.  


If not and they must be at home then be sure to keep an eye on them—remember, lots of opening and closing of different doors and gates. 


For Buyers

1. Stay Calm 

There will be problems with the new home, don’t panic! Not all issues are critical, and we will help you decide which ones are more serious and which are easily fixed.  


2. Don’t Ignore Water Problems 

I know, I know—we just said not to freak out. But if you see leaky ceilings, puddles or any water related issues in the basement you may want to think twice about the purchase.  


Water damage or problems can be expensive and difficult to address. 


3. We’re Not Psychic 

Although we do know an awful lot about homes, unfortunately, we can’t predict the future.  


Home inspections are visual inspections, and we can’t say exactly when something will need to be repaired or exactly how much it will cost, but we can give you rough estimates that will be helpful in your decision making process. 


Don’t let an inspection stress you out! We’re here to help make the process easy while making sure you’re as knowledgeable as possible about each step. 


Stop wasting time and get in touch with us today to schedule your own professional home inspection!  


Image attribution

Categories Energy Savings, Home Inspection

Maintaining Your Water Heater

Water Heater

During a home inspection, we always check water heaters. As the colder months are moving in it is extremely important that you take necessary measures to maintain your water heater.

Not only will keeping a well maintained water heater increase the value of your home, but it will ensure you avoid any major hazards or damage within the home.

What’s the Big Deal?

Worst case scenario with a poorly maintained water heater is that it becomes a ticking time bomb, almost literally. If there is a gas leak near the water heater, the small ignition flame could cause an explosion.

On the other hand, if safety measures fail in your water heater an extreme amount of pressure could build up leading to a dangerous water rocket of sorts.

Hopefully, these potential hazards are reason enough for you to make water heater maintenance a priority.

What Can You Do?

The best first step to take is to review the owner’s manual that came with your water heater if you can’t find it then check the manufacturer’s website for a copy.

If you feel that you are not comfortable handling the water heater yourself then don’t push your luck, call in a pro. Some things you can do to maintain your water heater are:

1. Check the Pressure Valve

Both gas and electric heaters have a temperature and pressure valve. Wearing goggles and gloves check the valve after turning off electricity or the pilot light.

2. Flush the Tank

Thanks to sediment buildup in the tank your heater’s efficiency can be affected. Flush the tank each time you check your pressure valve.

3. Lower the Temperature

Ideally, your heater’s temperature should be set between 120 -130◦F. Anything higher can cause serious burns as well as damage to your water heater.

4. Appropriate Insulation

Fiberglass wraps can maintain hot water and are easily installed by plumbers.

5. The Right Model

Make sure your water heater is up to date and right for your home. Generally, water heaters have a lifespan of 8-10 years and should be replaced soon after hitting the ten year mark.

6. Annual Appointments

Just like you go to the doctor for a yearly checkup, your water heater could benefit from a professional checkup each year too.

A pro will ensure that the safety mechanisms are in place and there are no leaks or drips.

Things to Look For

Leaks and drips coming from your water heater can be symptoms of a greater problem.

Faulty water supply connections are the most common culprit when it comes to leaks. Easily fix this issue with compression fittings.

Drips from the temperature and pressure relief valve usually mean a thermal expansion tank is needed.

In electric water heaters, the most common problem is turning the power on before the tank is full of water, leading to a burnt out upper heating element and no hot water.

Make sure the tank is full before turning on the power and if your upper heating element is burnt out it can be easily replaced.

We Can Help

At EIG we want to make sure your home is in tip top shape if you’re getting ready to sell or buy remember that your water heater is an important factor of the home.

If you’re ready for a home inspection, don’t hesitate to call in the professionals!

Image attribution

Categories Home Inspection, Home safety

Get Your Home Ready for Fall

Fall

Warmer weather is starting to disappear, leaves will be falling, and soon teen girls everywhere will be buzzing about pumpkin spiced lattes. Yes, the signs of fall are upon us.

Just as the seasons change, so do our own needs and concerns within our homes. If you live in a colder climate, you don’t want to be caught off-guard and unprepared.

Prepping your home in anticipation of the colder months can prevent unwanted repairs or even the devaluation of your home.

Follow our advice to “Fall-proof” your home and ensure you don’t run into any unnecessary problems.

Inside the House

1. Check for Drafts

Replace any seals or caulks around windows and doors or buy heavier, insulated drapery for windows to keep your house cozy.

2. Furnace Inspection

Contract an HVAC professional to test for leaks, check heating efficiency and change the filter.

3. Winterize AC

If you live in a colder area that won’t use central air conditioning consider covering your outdoor unit.


Exterior of the House

1. Review Your Roof

Remove leaves or debris from flat roofs and check for loose or broken shingles/tiles.

2. Clear the Gutters

Prevent clogging by removing all debris and draining outdoor faucets in colder areas.

3. Inspect Siding

Look for any cracks or holes.

4. Chimney Maintenance

If you regularly use a wood fireplace have it professionally cleaned and inspected.

5. Look at the Trees

Make sure there are no dying, low hanging or rotten limbs that could fall on your home or a power line.

6. Install Storm Windows

Replace screens with more appropriate coverings.

7. Tend to Patio Furniture

Remove, clean and cover cushions or bring outdoor furniture indoors.


In Your Garage

  1. Test your generator
  2. Keep extra gas handy
  3. Service summer equipment – Empty fuel in your lawnmower, clean trimmers and get any necessary repairs taken care of so when spring rolls around your tools are ready to go!

Deep Clean

Although many attribute spring to be the season of cleaning, fall is actually the time to start. Slash your spring cleaning list by getting on top of your chores earlier in the year.

  • Dust closets when swapping out summer clothes for sweaters.
  • Wash walls, baseboards, switch plates and light fixtures.
  • Steam clean stone surfaces.
  • Inspect grout, especially around showers and backsplashes.

Preventative maintenance can save you big on emergency repairs and wasted energy costs.

Add value to your property by properly keeping up with your home’s needs—taking a few simple steps now can help you avoid a full-blown crisis down the road.

We’re here to help!

If you’re preparing to put your home on the market, you won’t want to neglect the fall home maintenance guide. Additionally, make things much easier on yourself by calling in the pros!

At Elite Inspection Group we are bridging the gap between homeowner and inspector.

We offer extended services, easy and efficient scheduling, and once we’re finished, we will take you through the report in terms that you can easily understand.

If you’re ready for your home inspection today get in touch with us here!

Image attribution

Categories Home Inspection

Pass Your Pre-Sell Inspection With Flying Colors

Pre-Sell Inspection

When it comes to home inspections, many people think they’re only for prospective buyers, but getting an inspection before selling is actually a great idea.

It is an investment that will save you big on time and money in the long run.

Home inspections are one of the most mismanaged aspects of the home selling process and skimping on the pre-sell inspection can give the buyers the upper hand in negotiations.

Pre-Sell Inspection

A pre-list inspection will give you a strong standing to make a deal that satisfies you.

Take a look at these benefits of a pre-sell inspection.

1. Goodwill Gesture

Show buyers that you are willing to go beyond the expected and you have nothing to hide.

This will allow buyers to have a certain peace of mind when considering your home.

2. Save Money

This pre-sell inspection will make you aware of any issues before listing. Your home is more likely to sell fast if it is problem-free.

3. Spotlight Special Areas

Show off any upgrades or assets your home has to offer with a seller’s inspection.

Want to know how to ace your seller’s inspection, let’s take a look.

Sellers Inspection

If you want to help buyers truly appreciate the condition your home is in, take these steps before your inspection to ensure it goes as smoothly as possible.

1. Clear Access

Make sure all clutter is removed, and critical areas like furnace, water heater, AC units, and attics are easily accessible to the inspector.

2. Turn on the Lights

Replace any bulbs and make sure light fixtures are in working order.

3. Open House

Keep doors and gates unlocked for your home inspector.

4. Be Honest

Let inspectors know from the start of any flaws your home has. This could be a busted light fixture or broken tile.

5. Clean Filters

Change out filters in the HVAC system.

6. Check Monitors

Are your fire alarm and carbon monoxide monitors working? If not, replace them. If you aren’t sure, it’s time to check!

7. Look for Cracks

Any cracks in a window or a broken screen will show up in a report. Address these issues before the inspection.

8. Top Off Appliances

Make sure everything that should have a cap (gas lines, chimneys, etc.) that require caps should be covered. This can keep debris like leaves or animals from clogging.

9. Look at Your Vegetation

Do your trees need a trim? Take care of any low-hanging or dying branches.

10. Open and Close Everything

Check all your windows and doors to make sure they are working properly. Don’t forget to jiggle some doorknobs too!

11. Call a Pro

When in doubt if you come across a problem you’re not sure how to address, call a professional.

We Can Help!

Speaking of professionals, we are a team of highly skilled and qualified inspection pros. Use our advice to ensure a painless and effective seller’s inspection.

Check out our seller’s inspection services where you can find copies of our two types of inspection reports.

If you’re not sure which inspection you need, just give us a call, and we can help you schedule the best inspection for your home today!

Image attribution